WDSS and DataVest

A Great Combination for the Amusement Park

To 
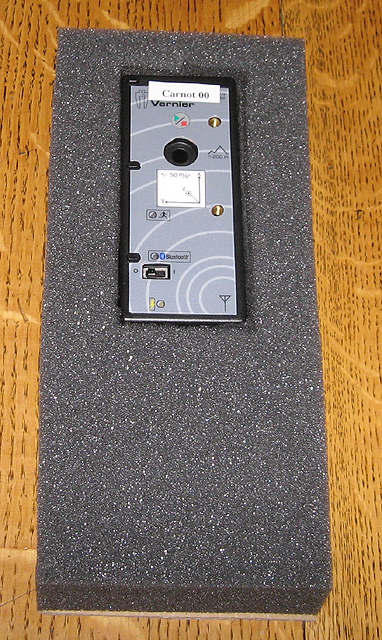
carry the WDSS unit in a DataVest, one needs to hold it so the Start/Stop button is readily accessible, and so the indicator LED is visible. The technique described below is relatively easy and yields a good result.
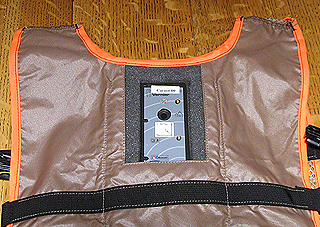
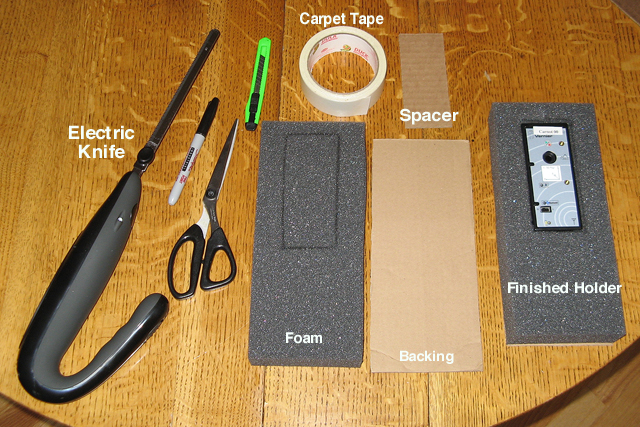
Materials:

Foam - 1.5" x 10" x 4.5"
Cardboard - 4.5" x 10" and 2" x 5"
Carpet Tape (double-sided)

Tools:

Sharp knife (wallpaper knife). Electric knife, Scissors, Straight edge

Preparation:
  1. Obtain foam that is the size you need or cut some to size.
  2. Mark the outline of where you will insert the WDSS unit. This size can be a bit smaller than the actual size of WDSS in order to hold it securely.
  3. Using the wallpaper knife and the electric knife, cut out the space for the WDSS. In addition, add a slit at the top into which the force probe mounting post can fit.
  4. Cut cardboard pieces to size. The cardboard does not need to be particularly stiff.
  5. Put two or more lines of carpet tape along the larger cardboard piece as shown in the photo on the next page.

 Assembly:

  1. Remove the protective covering from the carpet tape and press the foam onto the backing, securing it.
  2. Put the smaller cardboard piece inside the opening in the foam, sticking it to the backing.
  3. Insert the WDSS unit.
  4. Slide the entire assembly into the pocket on a DataVest. You will find you can operate the Power switch through the material, and should be able to clearly see what is happening with the WDSS unit while you are on a ride.
 
Use:

For instructions on use of the WDSS in the context of the amusement park, go to this url and download the document called Data Collection at the Amusement Park.

http://www2.vernier.com/booklets/data_park.pdf

Appendix I will give you step-by-step instructions for using WDSS at the park.


Download this document as an MS Word file: WDSSandDataVest.doc

Download this document as a pdf file: WDSSandDataVest.pdf


September 2007