|
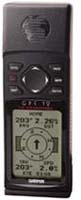
Garmin GPS 12 Graphical Analysis (college prep approach) Graph paper (conceptual approach Log Book and writing instrument |
|
Vectors are a very a very important basic concept in physics. Many of my students struggle with this basic concept. I wrote this activity in an effort to better teach that concept and help my students who need a more kinesthetic approach to this concept. The purpose of this activity is to acquaint students with vectors using the Global Positioning System 12 Personal Navigator.
Objectives:
Students will use the GPS to locate various points around the school campus. From that location effort they will plot the vectors that they traveled and do a vector analysis to determine a resultant vector. In this experiment the student will use a Garmin GPS 12 and Graphical Analysis to learn more about vectors.
Materials:
Garmin GPS
12 Graphical Analysis
(college prep approach) Graph paper (conceptual
approach Log Book and writing
instrument
Procedure: Each lab team will use a Garvin GPS 12 to locate three points on the school campus. Then the lab teams will graph the most direct path to each point in a sequential manner,
1. Start your quest for the path at the flagpole at the high school. Turn the GPS on by pressing the red button on the control panel to the left of the display panel. The first page will display the satellite information. The desired status, which is displayed in the upper left-hand corner of the display, is 2D Nav or 3D Nav. This will allow you to perform position location. If the display reads searching or acquiring, the GPS does not have enough information to plot your position.
2. Press the GOTO button, and the waypoints will be displayed. Highlight POSTN1(which is short for position one) on the display and press the ENTER button. Press the PAGE button to view the map display. The direction of position one from the flagpole (or the bearing) is given at the top right of the map display. Remember that 360 degrees is due north, 90 degrees is due east, 180 degrees is due south, and 270 degrees is due west. The map shown also shows the other positions, two, three and four. In the upper right hand corner the distance to position one is shown. Record both bearing and distance on your data sheet.
3. Press the PAGE button again, and the GPS displays the bearing and the distance to position one as well as a compass. If you start to walk in the direction of position one, as best you can, the compass will direct you to that position. The display will show your "track" which is the direction on the compass you are going. As you approach position one, the GPS will display a message that you are close to that position. You will find a stake, with orange paint on it, driven into the ground at Position One. You need to pull that stake up and bring it back to the classroom with you. They are numbered.
4. Repeat step 2, except highlighting position 2 (POSTN2) on the "goto waypoint list". Once again you will be given a bearing (the direction you want to go) and the distance you need to go to find position 2. Record both these values on your data sheet. It also be marked with a wooden stake
5. Repeat step 2, now for position 3 and then for position 4.
6. You now have data for all the positions showing how far away they are and the bearing or direction from each to the other in sequence. These are vectors. They have both magnitude (distance) and direction (bearing), and can be combined to find a resultant vector.
7. Return to the flagpole after you have gathered all the stakes from the 4 positions. After all the groups have returned we will go back to the classroom for calculations.
Calculations: (for Conceptual Physics)
1. Using a sheet of graph paper, draw your 4 vectors. Remember that they must be drawn with attention to direction and scale. Each lab group member must complete a graph.
2. Now redraw the vectors that represent the straightest path from the positions in sequential order. Use the head to tail method and keep the scale and direction the same as the original.
3. Draw a resultant vector that connects the flagpole with the last position. Measure the distance and the angle so that you can label the resultant vector.
4. Turn in your completed graph.
Calculations: (for College Prep Physics)
8. Resolve the resultant vector from your data collected using the GPS, using Graphical Analysis
9. Print your work
Garmin Link
